How to Use a Bella Electric Pressure Cooker
To use a Bella electric pressure cooker, add liquid and food, lock the lid, turn the valve to Seal, choose a program, and let the pot come to pressure. When cooking ends, release the steam, wait for the float valve to drop, and open the lid away from your face.
On this page (9 sections)
- How do you set up a Bella electric pressure cooker before cooking?
- How much liquid and food should go in the pot?
- How do you lock the lid and start a program?
- How long should you cook different foods?
- How do you release the steam safely?
- When can you open the lid?
- What are the most common Bella pressure cooker mistakes?
- Which pressure cookers are easy for beginners to learn on?
- What should you do after cooking and before the next use?
To use a Bella electric pressure cooker, add liquid and food, lock the lid, set the valve to Seal, choose a program, and let it build pressure. When the timer ends, release the steam, wait for the float to drop, then open the lid facing away from you.
A Bella works like most electric models, so the routine is the same once you learn it. The order of the steps matters more than the buttons, and getting the lid and valve right prevents most problems on the first try.
How do you set up a Bella electric pressure cooker before cooking?
Check the pot, ring, and lid, then plug in and set the valve to Seal. A quick once-over stops most failed first cooks before they start.
Pull the inner pot out and confirm it sits flat in the base. Look at the sealing ring under the lid for cracks or food stuck in the groove, then snap the lid on and twist until the marks line up.
Set the steam release handle to Seal, not Vent. On most Bella models this is a small knob on top of the lid, and leaving it on Vent means the pot never builds pressure.
Keep the appliance on a dry, level counter with space above it for steam. Don't plug it into a strip shared with heavy appliances, and keep the cord away from the stovetop.
How much liquid and food should go in the pot?
Add at least the minimum thin liquid your manual lists, usually about 1 cup, and keep the pot below its fill line. Liquid is what turns into steam and creates pressure.
Water, broth, and thin sauces work well. Very thick mixtures alone can scorch on the bottom and stop the pot from sealing, so loosen them with water or broth first.
Don't fill past the maximum mark stamped inside the pot. For soups, stews, and anything that foams, stop lower than the top line, because expanding liquid can block the steam vent.
If you're new to pressure cooking in general, our step-by-step pressure cooker guide covers the same sequence for every major brand.
Leave room for the lid to close without food touching it. Big cuts of meat and whole chickens belong on a rack, which is where a trivet helps.
How do you lock the lid and start a program?
Line up the lid marks, twist it shut, set the valve to Seal, then press the program and Start. The pot does the rest once the lid is locked.
Most Bella cookers use the same pattern: choose a preset like Rice, Beans, or Meat, adjust the time if the manual says you can, and press the start button. Some models begin automatically once you pick a preset.
You'll hear the pot come up to temperature, and the float valve will pop up as pressure builds. That first warm-up can take 10 to 15 minutes, longer with a full pot or cold food.
Don't lift the lid to peek once it's running. Opening it releases the pressure and restarts the whole cycle, and the steam is hot enough to burn.
Program names vary by model, so read your own Bella manual for the button layout. The sequence stays the same even when the labels differ.
How long should you cook different foods?
Use the presets as a starting point and adjust for size, not just weight. A full pot takes longer to come to pressure, so the total time tops the recipe's cooking time.
Tough cuts like chuck roast and pork shoulder benefit from 60 to 90 minutes under pressure. Dried beans usually need 25 to 45 minutes depending on the type, and soaked beans cook much faster.
Rice and grains run shorter, often 3 to 12 minutes. Vegetables cook in a few minutes, so cut them evenly and release pressure quickly so they don't turn mushy.
Remember that the timer only starts once pressure is reached. Plan for warm-up and release time when you're cooking for a set dinner hour.
A good pressure cooker with clear presets makes this easier, and models with labeled programs cut the guesswork for beginners.
How do you release the steam safely?
Turn the valve to Vent for a quick release, or leave it on Seal for a natural release. Which one you pick depends on the food.
Quick release is best for vegetables, grains, and anything you don't want to overcook. Stand back, use a long spoon or the handle if your model has one, and let the steam shoot away from you.
Natural release suits meats, soups, and beans, because the pot cools slowly and the food finishes gently. It can take 10 to 20 minutes, and the float valve drops when it's done.
For starchy or foamy foods, do a short natural release first, then vent the rest. A full quick release on a pot of soup can spit liquid through the valve.
Never put your face over the valve or hold a towel directly over the steam. Let it escape into open air, and keep kids and pets back.
When can you open the lid?
Open the lid only after the float valve has dropped. That small pin is the signal the pressure is gone, and it's the one check you should never skip.
If the float is still up, wait. Forcing the lid can be dangerous, and the interlock on most Bella cookers won't let you open it anyway.
Once it drops, twist the lid and lift it away from you, tilting it so condensation runs back into the pot rather than onto your arm. Set the lid down on the counter, not on the hot pot.
Check doneness before serving. If meat is still tough, lock the lid, return the valve to Seal, and give it another 10 minutes.
What are the most common Bella pressure cooker mistakes?
The top mistakes are a valve left on Vent, too little liquid, and opening the lid too early. Each one has a simple fix you can check in seconds.
If the pot won't come to pressure, confirm the lid is fully twisted, the valve is on Seal, and the sealing ring is seated. A worn or stretched ring is a common culprit and easy to replace.
Overfilling causes sputtering through the valve, so fill less next time. Skipping the float check risks a steam burn, so always wait for the pin to drop.
Don't leave food on Keep Warm for hours, especially dairy or rice, without checking your manual's guidance. Unplug the cooker and let it cool before cleaning the inner pot, lid, and ring.
If you're choosing between models rather than learning one you own, our guide to pressure cooker types explains how electric, stovetop, and multi-cookers differ.
Which pressure cookers are easy for beginners to learn on?
A 6-quart electric model with clear presets and a simple steam switch is the easiest place to start. The steps above apply to almost every one, so a well-labeled control panel saves time.
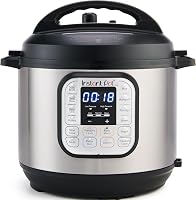
The Instant Pot Duo 6 Qt has 13 one-touch programs covering pressure cooking, slow cooking, sauté, rice, yogurt, and steaming. Its Easy-Release switch makes venting a single motion, which helps when you're learning the release step.
The Cosori 6 Qt Pressure Cooker spreads functions across 9-in-1 presets, including sous vide and ferment, and uses a ceramic-coated inner pot. Its Seal/Vent button sits away from the steam valve, and the vent angles backward to keep steam away from your hand.
For larger households or big batches of beans and stews, compare 8 quart pressure cookers instead of squeezing everything into a 6-quart pot.
What should you do after cooking and before the next use?
Unplug the pot, let it cool, then wash the inner pot, lid, and sealing ring by hand or as your manual allows. Clean parts seal better and cook more evenly next time.
Wipe the heating base with a damp cloth only, and never soak it. Check the steam valve for food debris and clear it if needed.
Dry the sealing ring and lid groove fully before storing the lid upside down on the pot. That keeps the ring from picking up odors and lets air circulate.
Learning to use a Bella electric pressure cooker comes down to a short checklist: liquid in, lid locked, valve on Seal, program set, steam released, float down. Run through it once and the next cook feels routine.
Frequently asked questions
How much liquid does a Bella electric pressure cooker need?
Most electric pressure cookers need at least 1 cup of thin liquid to build steam, so check your Bella manual for the exact minimum. Thin liquids like water or broth work; thick sauces alone can scorch and prevent pressure from building.
What does the float valve tell you on a Bella pressure cooker?
The float valve rises once the pot is under pressure and drops when the pressure is gone. You can only open the lid safely after the float has dropped, so never force it while the valve is still up.
Why is my Bella pressure cooker not coming to pressure?
A loose lid, a valve left on Vent, too little liquid, or a worn sealing ring are the usual causes. Check the lid is twisted fully shut, the valve is on Seal, and there is at least the minimum liquid before trying again.
Can you open a Bella electric pressure cooker right after cooking?
Only after the steam is released and the float valve drops. A quick release takes a few minutes for most recipes, while natural release can take 10 to 20 minutes depending on how full the pot is.